
Believe it or not laying the track was my biggest concern during this project. I would be trying something new (at least to me), gluing the track down with silicon caulk. I had read about the approach, but never tried it – until now. And I’m happy to say it went well.
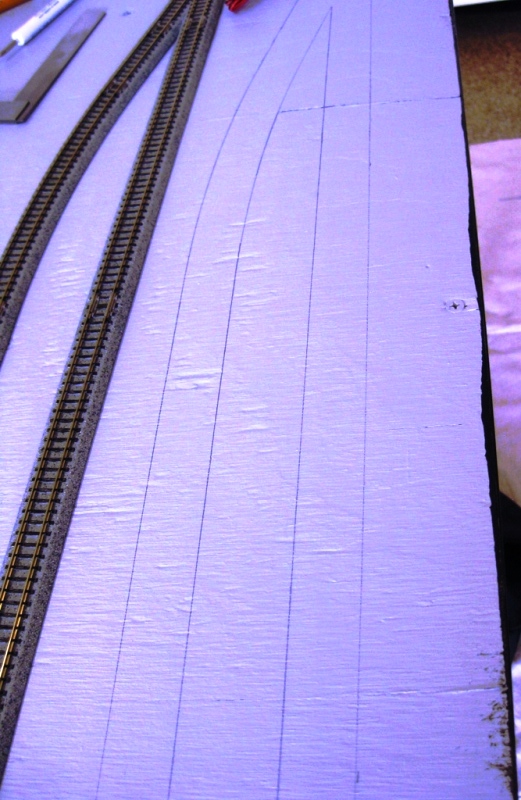
Kato Unitrack can be nailed down, by piercing through pre-located holes in the roadbed (look at the bottom side of the track to find them. But I didn’t want to have nails showing all over the layout, so instead I elected to glue it down. First, I need to ensure the track was placed where I wanted it (see below) and then traced around both sides of the roadbed with a pencil.
 To be honest, I didn’t just start tracing. I took my time placing the track exactly where I wanted it. The point at which the track crossed the module joints had to be measured and placed to support the use of the Kato expansion track pieces. These are cool sections of track that expand from about 3 inches to 4.25 inches. I spaced my track 4 inches apart and drew lines marking the positions.

I then worked my around the layout until all the sections had been placed and traced. Then I was ready to start gluing.
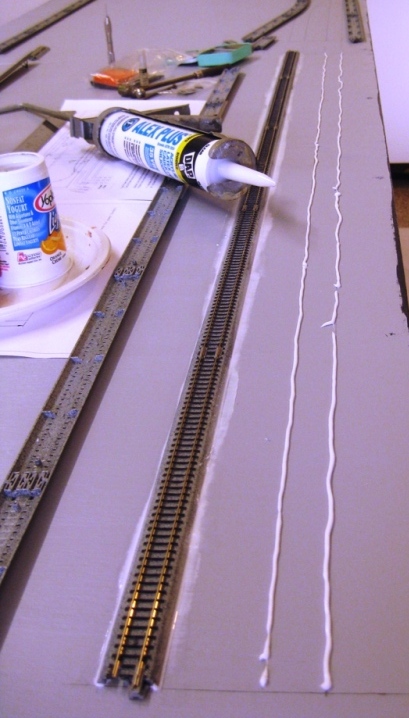
Using clear silicon caulk, I placed a small bead down each line being careful to follow the lines as best as I could. I worked a few feet at time trying not to make a mess.

After pressing the track down into the caulk, and ensuring it was still aligned, I smoothed the bead of caulk by sliding my wet finger along the edge of the roadbed (just like caulking a shower or countertop). Since the caulk is clear, I didn’t worry too much about getting it on the side of the roadbed. Besides eventually my scenery folks would blend the track work into the overall scenery scheme and make it all come together.
For the tracks that ended at a joint, I had pre-drilled the nail hole at the end to accommodate a single nail. Since they would undergo extra stress each time the expansion tracks were installed and removed (during layout set up and tear down) I wanted a little extra protection in addition to the glue. I also had decided NOT to glue down the turnouts (in case they needed to be removed/repaired) and used track nails for them as well. Of course I didn’t glue down the expansion tracks – I almost did once, but I caught myself!
For the track that had wiring underneath, it took a little extra care to get the wire routed through the hole and the track placed just right. Here, of course, the benefit of pre-drilling the plywood (in the previous installment) paid off.
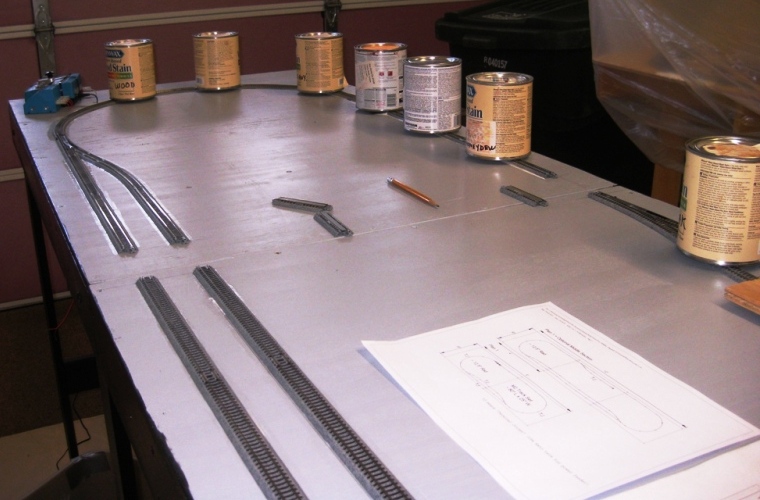
Little by little I worked my way around the entire layout, weighing down the track with paint cans (handy and heavy) while the silicon set and cured. By the next day everything was dry (not tacky to the touch) and secure.


I am very pleased how well the silicon method worked. Time will tell if it was a good choice, but right now I’m confident it was.
Tune in again for our final installment, track wiring – hooking it all up. – Phil S.
